728x90
학교 연구실 PC에서 작업하던 것을 집에서도 이어서 하고 싶어서 집에 와서 내 노트북에 내 레파지토리를 clone해왔다. 그러고 나서 코드를 수정하고 add와 commit까지는 잘 했다. 그런데 push가 안 되는 것이었다.

remote: Permission to 깃허브 주소 denied to
atal: unable to access 내 깃허브 주소 The requested URL returned error: 403
뭐가 치명적이라는건지 fatal이라면서 403 에러가 났다.
해결방법은 다음과 같다.
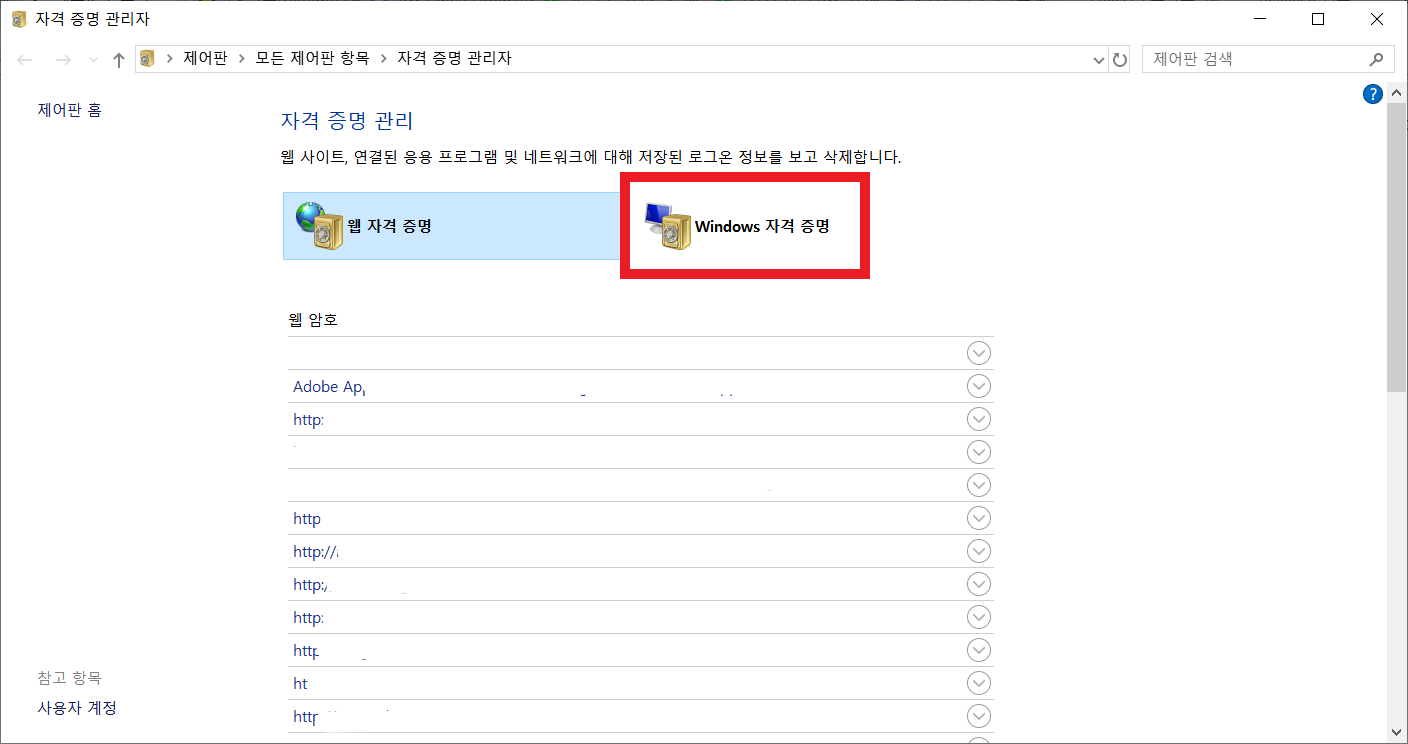
1. 제어판의 자격 증명 관리자에 들어간다. (아래 사진과 같이 검색해서 들어가는 것이 빠름)

2. Windows 자격 증명 클릭

3. git:https://github.com을 화살표 버튼을 눌러서 열어준다.

4. 편집 버튼을 누른다.

5. 사용자 이름과 비밀번호를 각각 깃허브의 아이디, 비밀번호로 바꿔준다.

6. 그리고 저장하면 끝. 이제 push가 될 것이다.
728x90
'GitHub' 카테고리의 다른 글
| [GitHub] warning: LF will be replaced by CRLF in gradlew 에러 (0) | 2020.02.01 |
|---|
